
Search our website enhanced by Google.
An introduction to grain sampling
Grain quality is variable – even across individual ears. Samples taken as the grain goes into the store will be more representative than those taken from the bulk, once the grain is in store. The only exception is for any contaminant produced during storage (e.g. insects or storage mycotoxins).
There are numerous factors that influence grain variability going into store, including:
The way grain is harvested, moved and stored also adds to the variation.
The initial priorities are to:
The use of relatively small storage units (e.g. 60 t capacity bins) makes it easier to track grain to samples taken at harvest.
If a risk assessment indicates that field mycotoxins may be a problem or if the buyer has a requirement for confirmatory analysis of toxin levels, it is particularly important to take representative samples at this stage.
Tests range from simple on-farm tests, which indicate the presence or absence of a specific mycotoxin, to officially recognised and validated methods that quantify levels. All methods require prior extraction from a ground grain sample.
Qualitative lateral flow dipstick methods indicate the presence or absence of a specific mycotoxin above a set threshold. Presence, or absence, of a test band is interpreted by reference to the manufacturer’s instructions.
Quantitative assay methods measure the concentration of a specific mycotoxin. Test kits are available in two formats. Quantitative lateral flow is suitable when a single determination is required (e.g. grain storage/intake). Microtiter plate ELISA is suitable for analysing multiple samples.
Confirmatory analysis uses sophisticated, costly instruments operated by highly skilled staff. Methods are validated according to (EC) No 401/2006 and conducted by laboratories with current UK Accreditation Service (UKAS) status.
Risk assessment for fusarium mycotoxins in wheat
Use the safe storage time calculator to inform your storage strategy
The best approach to grain sampling depends on the sampling point (e.g. at harvest, in store, outloading and intake). However, there are three broad sampling stages – incremental samples, aggregate samples and representative samples.
Find out about the basic sampling requirements
Samples taken should represent identifiable units (e.g. store bay, silo section or individual bin) in the grain store.
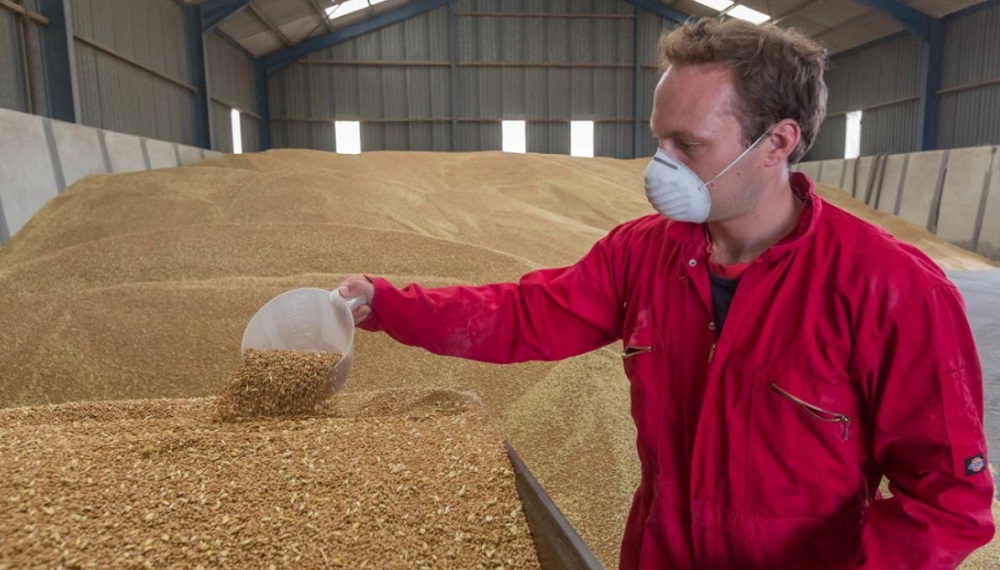
As grain is tipped, take two 500 g samples from each trailer. Ideally, sample a quarter and three-quarters of the way through tipping.
If grain is wet (moisture content over 16%), spread samples thinly on a large sheet of paper or polythene. Leave overnight in a warm place. However, if grain is very wet (i.e. when on-floor drying is unlikely), pass it through a dryer.
Take frequent, small (250 g) samples from the cleaner/dryer outlet, so that at least 10 samples represent each 100 t (i.e. sample every 10 t passing through the dryer).
Notes
After grain conditioning, if a bucket loader is used to move grain into a bulk, samples can be taken using an automatic bucket sampler.
High-temperature drying will reduce moisture and moisture variability, but will require more urgent cooling.
Mix the incremental samples to form an aggregate grain sample, which represents no more than 100 t.
If the 100 t lot is part of a flat store heap larger than 100 t, ensure that the aggregate sample can be traced to the relevant part of the store.
Ensure the aggregate sample is well mixed. Then, take five 200 g subsamples from across the aggregate sample to form a 1 kg representative sample. Make at least two representative samples – one for the buyer/merchant and one for retention by the seller.
Keep samples in clearly labelled plastic bags with the following information:
Ensure samples are sufficiently dry and kept in rodent-proof containers.
Retain samples until payment has been received.
 Tim Scrivener
Videos from Frontier (based on AHDB grain sampling guidance)
